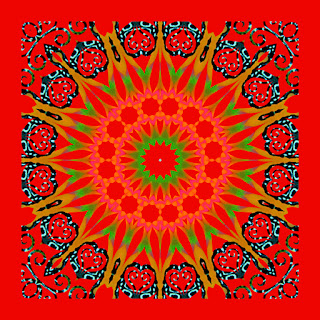
Friday, July 27, 2012

Kaleidoscope Fun Part 2

In my last post I shared a simple technique for creating a kaleidoscope in Kaleidoscope Kreator, then importing the saved Kaleidoscope back into the program for further manipulation. Today I'll show an easy digital layering technique for creating the center of a medallion quilt. (If you are not familiar with the Kaliedoscope Kreator program, which I'll call KK from now on, you can refer to my original post, or go to the KALcollections website for more information.)

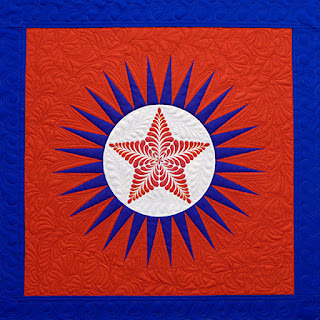
I'm lucky to write a column called Filler Finesse for Machine Quilting Unlimited.  Each issue I show how to quilt three filler designs, including a written description, diagrams, and stitch outs of each filler. I also create a composition where I use all three fillers. In every issue I try to make the composition a little different. The first three issues of this year I made pictorial compositions (see an example here), but I wanted to switch things up a little for the next three. Here's the example from the July/August issue:

When I first started quilting the part I loved the most was the piecing. I've pieced many a sharp point in my day, but honestly didn't want to do that for this design. OK, this may seem like cheating, but for this little wall hanging I decided to use a couple of different software programs to create the look I wanted. It was much faster than piecing!

First I used Electric Quilt to create the blue rays. Briefly, I modified the block "Dean's Sunflower Sun", found in the Contemporary Pieced, Sun Compasses library. I simplified the block so that it consisted only of the rays, and then used the block by itself in a quilt layout. Then I exported that image as a jpeg. I originally saved the "quilt" with black rays, and later changed the background to red and the rays to blue in Photoshop.
The compass as it appeared when exported out of Electric Quilt

I used the magic wand tool in Photoshop to change the color of the rays and background
The next step was to use KK to create the feathered star in the center. I started with a photograph of a sunset that has a lovely gradation of oranges in the sky. Using a feathered star template it was a snap to create the star that I wanted, then save the star as a jpeg.
I imported the feathered star into Photoshop and created a duplicate of the background layer.  I used the magic wand tool to select and then clear the white background from the duplicate layer, leaving me with just the feathered star. I then dragged the star over the red, white, and blue compass.

I resized the star to fit the center circle, adjusted my colors a little, and voila, my cheater panel was complete! I printed it as large as I could (13"x13" on my printer), then added the blue borders. All of those solid colors provided a great canvas to show off my fillers.

Stay tuned for Part 3 of this series on ways I use  Kaleidoscope Kreator in my work, where I'll show how I've used kaleidoscopes in digital collages for art quilts.

Wednesday, July 25, 2012

Kaleidoscope Fun Part 1

I've been meaning to write a post about Kaleidoscope Kreator for a long time. It's a very fun, and very easy to use, software program that creates beautiful kaleidoscopes from your images. The more I thought about it, I realized that I really need to write three separate posts to show some of the ways I use it for my digital art.

Kaleidoscope Kreator is a very simple program to use. Basically you open the program, import an image from your computer, then select shapes from a template library to use in creating the kaleidoscope.  There are videos on the Kaleidoscope Kreations website that show how to do this.

Once your image is open the fun begins. By simply moving the image around the kaleidoscope changes, just as turning the outside of a real kaleidoscope changes what you see. Mesmerizing and fun! Though beautiful straight out of the program, the images can also be used in creative ways in conjunction with other software programs to create a wide variety of images.

In this post, Part 1, I'll show how I create kaleidoscopes, then import them back into the program to create a new look. Part 2 will show how to use a kaleidoscope with a simple layer to create a medallion center for a quilt, while in Part 3 I'll share how I've used kaleidoscopes as layers in digital collages for art quilts.

Obviously I love to play with digital images (as you can see in my DVD, Digital Collage for Quilt Design From Start to Finish). As I started to use Kaleidoscope Kreator (from here on out I'll call it KK) I wondered what would happen if I created a kaleidoscope, then brought it back into the program and played with it some more? Well, let's see!!

Here's a digital collage that I created in Photoshop. It has many layers, and I didn't keep track of what they all are, but I do know that the grid part is from a photo of duct tape residue, and the circle is a dome inside the National Gallery of Art in Washington, D.C.
I love this image on its own, but decided to play with it some in KK. Of course, photographs produce beautiful kaleidoscopic designs, but what can I say, I love to experiment!

I imported my image into KK, and chose a feather template. (If you wish to see a larger image, just click on the photo for a clearer view.)
This is a screen shot of my image in the program. I added the red ellipse to highlight where the feather is since the contrast is low here. In this instance I used the eyedropper tool to change the background of the kaleidoscope from the default (white) to a color that was already in my image.
Here is the resulting kaleidoscope, which is visible in the top right corner of the screenshot above. Pretty, right?

When I'm planning on using this process of reimporting a kaleidoscope for further manipulation, I like to choose one of the more lacy templates for my initial shape, as shown below:
(These templates are add-ons to the initial program.)

I saved this kaleidoscope, then opened the saved file in the program, as seen below.
Here I used a simpler, more solid template shape. And here's the resulting kaleidoscope:
A whole different look, and wouldn't this look great as yardage, or a note card? By reimporting the image a whole new world of designs is possible.

For one of my Quilting Arts TV projects (directions for which are available here) I designed a simple purse with a kaleidoscope flap.
 (For this kaleidoscope I imported the digital design for this quilt, and the original template I chose was one of the filigrees.)
As with anything digital, the options are endless! Stay tuned for Parts 2 and 3 of this series, where I'll show some other ways I've used Kaleidoscope Kreator.

Full disclosure: Back in early 2011 I was given the opportunity to use Kaleidoscope Kreator to design a project for QATV (episode 810). I was given a copy of the software, and add-on templates, to use, and compensated for making the project. However, Kaleidoscope Kreator was on my list of things to try out, so eventually I would have tried it out on my own. I'm simply writing these posts to share some fun ways I've used the program.